How to Record Electric Guitar: A Comprehensive Guide
Editor’s Note:How to record electric guitar is an important topic for musicians of all levels. Whether you’re just starting out or you’re a seasoned pro, getting a great guitar sound is essential. That’s why we’ve put together this comprehensive guide to help you record electric guitar like a pro.
We’ve done the research and put in the time to create this guide, so you can be sure that you’re getting the most up-to-date information on how to record electric guitar. We’ll cover everything from choosing the right gear to setting up your recording space to getting the perfect sound.
Key Differences
| Direct Input | Microphone | |
|---|---|---|
| Pros | – Clean, noiseless signal- Consistent sound- Easy to set up | – More natural sound- Captures the ambience of the room- More versatile |
| Cons | – Can sound sterile- May not capture the full range of the guitar’s sound- Requires an audio interface | – Can be noisy- Can be difficult to get a consistent sound- Requires a good microphone and preamp |
Main Article Topics
- Choosing the Right Gear
- Setting Up Your Recording Space
- Getting the Perfect Sound
- Troubleshooting Common Problems
1. Guitar
The type of guitar you use will have a significant impact on the sound of your recordings. Here are a few things to consider:
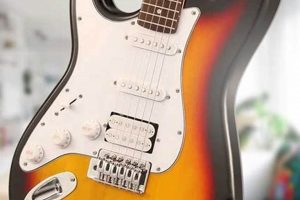
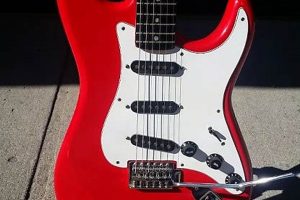
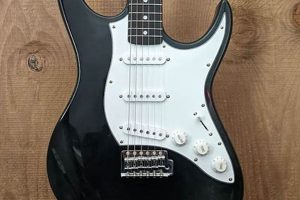
- Body style: The body style of your guitar will affect the resonance and sustain of your notes. Solid-body guitars have a brighter, more focused sound, while hollow-body guitars have a warmer, more resonant sound.
- Pickup configuration: The pickup configuration of your guitar will affect the tone of your sound. Single-coil pickups have a brighter, more twangy sound, while humbucker pickups have a warmer, more powerful sound.
- String gauge: The string gauge of your guitar will affect the tension of the strings and the overall sound of your guitar. Heavier strings have a thicker, more powerful sound, while lighter strings have a brighter, more twangy sound.
It’s important to experiment with different guitars to find the one that sounds best for your playing style and the music you want to record.
Here are a few examples of how different guitars can be used to achieve different sounds:
- A solid-body guitar with single-coil pickups is a good choice for recording bright, twangy sounds, such as country and rockabilly.
- A hollow-body guitar with humbucker pickups is a good choice for recording warm, jazzy sounds.
- A guitar with a Floyd Rose tremolo system is a good choice for recording heavy metal and other genres that require extensive use of the whammy bar.
Ultimately, the best way to learn how to record electric guitar is to experiment with different guitars and find the one that sounds best for you.
| Guitar Type | Sound | Examples |
|---|---|---|
| Solid-body guitar with single-coil pickups | Bright, twangy | Country, rockabilly |
| Hollow-body guitar with humbucker pickups | Warm, jazzy | Jazz, blues |
| Guitar with a Floyd Rose tremolo system | Heavy, aggressive | Heavy metal, hard rock |
2. Amplifier
The amplifier is one of the most important pieces of gear in your recording chain. It’s responsible for shaping the tone of your guitar, so it’s important to choose an amp that complements the sound you’re trying to achieve. There are many different types of amplifiers on the market, so it’s important to do your research and find one that’s right for you.
When choosing an amplifier, there are a few things to keep in mind:
- Power: The power of an amplifier is measured in watts. The more watts an amplifier has, the louder it will be. If you’re planning on playing in a loud band, you’ll need an amplifier with a lot of power.
- Tone: The tone of an amplifier is determined by its preamp and power amp. The preamp shapes the overall sound of the amplifier, while the power amp provides the power to drive the speakers. There are many different types of preamps and power amps on the market, so you can find an amplifier that produces the sound you’re looking for.
- Features: Amplifiers come with a variety of features, such as reverb, delay, and chorus. These features can be useful for adding depth and space to your sound.
Once you’ve considered these factors, you can start narrowing down your choices. It’s a good idea to try out different amplifiers before you buy one to make sure you find one that you like the sound of.
Here are a few examples of how different amplifiers can be used to achieve different sounds:
- A clean amplifier with a bright tone is a good choice for recording country and pop music.
- A tube amplifier with a warm, overdriven tone is a good choice for recording blues and rock music.
- A high-gain amplifier with a heavy distortion is a good choice for recording metal music.
Ultimately, the best way to learn how to record electric guitar is to experiment with different amplifiers and find the one that sounds best for you.
| Amplifier Type | Sound | Examples |
|---|---|---|
| Clean amplifier with a bright tone | Country, pop | Fender Twin Reverb, Vox AC30 |
| Tube amplifier with a warm, overdriven tone | Blues, rock | Fender Deluxe Reverb, Marshall JTM45 |
| High-gain amplifier with a heavy distortion | Metal | Mesa Boogie Dual Rectifier, Peavey 5150 |
3. Microphone
The microphone is one of the most important pieces of gear in your recording chain. It’s responsible for capturing the sound of your guitar, so it’s important to choose a microphone that is designed for recording electric guitar. There are many different types of microphones on the market, but not all of them are created equal.
When choosing a microphone for recording electric guitar, there are a few things to keep in mind:
- Type: There are two main types of microphones: dynamic and condenser. Dynamic microphones are more rugged and can handle higher
sound pressure levels, making them a good choice for recording loud guitars. Condenser microphones are more sensitive and have a wider frequency response, making them a good choice for recording quieter guitars. - Polar pattern: The polar pattern of a microphone determines the direction from which it picks up sound. Cardioid microphones are the most common type of microphone for recording electric guitar. They pick up sound from the front and reject sound from the back, which helps to reduce feedback.
- Frequency response: The frequency response of a microphone determines the range of frequencies that it can pick up. A microphone with a wide frequency response will be able to capture the full range of your guitar’s sound.
Once you’ve considered these factors, you can start narrowing down your choices. It’s a good idea to try out different microphones before you buy one to make sure you find one that you like the sound of.
Here are a few examples of microphones that are commonly used for recording electric guitar:
- Shure SM57: The Shure SM57 is a dynamic microphone that is known for its ruggedness and versatility. It’s a good choice for recording both loud and quiet guitars.
- Sennheiser MD 421: The Sennheiser MD 421 is another dynamic microphone that is known for its warm, natural sound. It’s a good choice for recording guitars with a lot of low end.
- AKG C414: The AKG C414 is a condenser microphone that is known for its wide frequency response and high sensitivity. It’s a good choice for recording guitars with a lot of detail and nuance.
Ultimately, the best way to learn how to record electric guitar is to experiment with different microphones and find the one that sounds best for you.
| Microphone Type | Polar Pattern | Frequency Response | Applications |
|---|---|---|---|
| Shure SM57 | Cardioid | 40 Hz – 15 kHz | Loud guitars, close miking |
| Sennheiser MD 421 | Cardioid | 30 Hz – 17 kHz | Guitars with a lot of low end, close miking |
| AKG C414 | Cardioid, omnidirectional, figure-8 | 20 Hz – 20 kHz | Guitars with a lot of detail and nuance, distant miking |
4. Audio interface
An audio interface is an essential piece of gear for recording electric guitar. It converts the analog signal from your guitar into a digital signal that can be recorded by your computer. The quality of your audio interface will have a significant impact on the sound of your recordings.
- Preamps: The preamps in your audio interface are responsible for amplifying the signal from your guitar. High-quality preamps will provide a clean, clear sound with plenty of headroom.
- Converters: The converters in your audio interface are responsible for converting the analog signal from your guitar into a digital signal. High-quality converters will provide a high-resolution, accurate digital representation of your guitar’s sound.
When choosing an audio interface, it’s important to consider the following factors:
- The number of inputs and outputs you need.
- The quality of the preamps and converters.
- The latency (delay) of the audio interface.
- The compatibility of the audio interface with your computer.
Once you’ve considered these factors, you can start narrowing down your choices. It’s a good idea to read reviews and compare prices before you buy an audio interface.
Here are a few examples of high-quality audio interfaces that are suitable for recording electric guitar:
- Focusrite Scarlett 2i2
- PreSonus AudioBox USB 96
- Universal Audio Apollo Twin X
By choosing a high-quality audio interface, you can ensure that you’re getting the best possible sound quality from your electric guitar recordings.
5. Recording software
Recording software is an essential tool for recording electric guitar. It allows you to capture your guitar’s sound, edit your recordings, and mix them down into a finished product. Choosing the right recording software can make a big difference in the quality of your recordings.
- Features: The features of your recording software will determine what you can do with your recordings. Some recording software programs offer a wide range of features, while others are more basic. Consider the features that are important to you when choosing a recording software program.
- Ease of use: The ease of use of your recording software will determine how quickly you can learn to use it. Some recording software programs are more intuitive than others. If you’re new to recording, it’s important to choose a recording software program that is easy to use.
- Compatibility: The compatibility of your recording software with your computer is important. Make sure that the recording software program you choose is compatible with your operating system and your computer’s hardware.
- Price: The price of your recording software is also an important consideration. Recording software programs can range in price from free to hundreds of dollars. Choose a recording software program that fits your budget.
By considering these factors, you can choose the right recording software for your needs and start recording your electric guitar tracks today.
6. Recording space
The recording space is a crucial component of how to record electric guitar effectively. The room’s acoustics can significantly influence the overall sound and quality of your recordings. Here’s why:
Acoustic Treatment:The acoustic treatment of a room refers to the use of materials and techniques to control sound reflections and reverberation. A well-treated room will minimize unwanted echoes and standing waves, resulting in a cleaner and more accurate representation of your guitar’s sound. Without proper acoustic treatment, the sound of your guitar can become muddy and distorted, making it challenging to achieve a professional-sounding recording.
Minimal Background Noise:Background noise can interfere with the clarity and detail of your guitar recordings. Choosing a room with minimal background noise is essential to capture a clean and pristine sound. This means eliminating sources of noise such as air conditioners, fans, traffic, or other external disturbances. A quiet recording environment allows you to focus on capturing the nuances and subtleties of your guitar playing without distractions.
Practical Significance:The choice of recording space can have a profound impact on the outcome of your electric guitar recordings. By selecting a room that is acoustically treated and has minimal background noise, you can create an optimal environment for capturing high-quality audio. This ensures that the true sound of your guitar is accurately represented in your recordings, making it easier to achieve a polished and professional mix.
Tabl
e: Acoustic Treatment vs. Untreated Room
| Acoustic Treatment | Untreated Room |
|---|---|
| Reduces echoes and standing waves | Creates muddy and distorted sound |
| Provides a clean and accurate sound | Interferes with clarity and detail |
| Enhances the nuances of guitar playing | Makes it difficult to achieve a professional-sounding recording |
7. Mic Placement
Mic placement is a crucial aspect of recording electric guitar, as it directly influences the tone and character of the captured sound. By experimenting with different mic placements, you can achieve a wide range of sonic possibilities, from warm and intimate to bright and airy.
- Distance from the Speaker: The distance between the microphone and the speaker cone plays a significant role in shaping the sound. Placing the mic closer to the speaker results in a fuller, more bass-heavy tone with pronounced proximity effect. Conversely, moving the mic further away creates a more balanced and airy sound with less low-end emphasis.
- On-Axis vs. Off-Axis Placement: The angle at which the microphone is positioned relative to the speaker axis also affects the sound. Placing the mic directly on-axis (pointing straight at the speaker) captures a more focused and brighter tone. Moving the mic off-axis introduces a warmer, less harsh sound with reduced high-frequency content.
- Multiple Microphone Techniques: Using multiple microphones can provide even greater control over the recorded sound. Blending the signals from two or more microphones placed at different distances and angles allows you to create a more complex and nuanced sound that captures the full spectrum of the guitar’s tone.
- Experimentation and Personal Preference: Ultimately, the best mic placement for recording electric guitar is a matter of personal preference and the desired sound. Experimenting with different placements and listening to the results is the key to finding the optimal position that complements your guitar’s tone and playing style.
By understanding the principles of mic placement and experimenting with various techniques, you can harness the power of this essential recording element to capture the perfect electric guitar sound for your music.
8. EQ
Equalization (EQ) plays a vital role in shaping the tone of an electric guitar recording. It allows you to boost or cut specific frequency ranges, giving you precise control over the overall sound. Understanding how to use EQ effectively is essential for achieving the desired guitar tone in a recording.
EQ can be used to address various aspects of the guitar’s sound, such as:
- Bass frequencies: Boosting the low frequencies can enhance the warmth and fullness of the guitar’s tone, while cutting them can reduce muddiness.
- Midrange frequencies: Adjusting the midrange frequencies can affect the body and presence of the guitar. Boosting the mids can bring out the guitar’s character, while cutting them can reduce harshness.
- High frequencies: Boosting the high frequencies can increase the brightness and clarity of the guitar’s tone. However, excessive boosting can lead to a thin and shrill sound.
When using EQ to shape the guitar’s tone, it’s important to consider the following:
- Use precise adjustments: Subtle changes in EQ can make a significant difference in the sound. Avoid drastic boosts or cuts, as these can result in an unnatural or distorted tone.
- Listen critically: Use your ears to evaluate the changes you make. Listen for any imbalances or unwanted resonances in the guitar’s tone.
- Experiment with different EQ curves: There are various EQ curves available, such as shelving filters, bell filters, and parametric EQs. Experiment with different curves to find the one that best suits the desired sound.
By mastering the art of EQ, you can enhance the tone of your electric guitar recordings, giving them the clarity, warmth, and presence you desire. It’s a powerful tool that allows you to shape the sound of your guitar to perfectly complement your music.
Table: EQ Frequency Ranges and Their Impact on Guitar Tone
| Frequency Range | Effect on Tone |
|---|---|
| Low frequencies (below 200 Hz) | Warmth, fullness |
| Midrange frequencies (200 Hz – 2 kHz) | Body, presence |
| High frequencies (above 2 kHz) | Brightness, clarity |
9. Compression
Compression is an essential tool for controlling the dynamics of an electric guitar recording. It allows you to reduce the volume of loud peaks and increase the volume of quiet passages, resulting in a more consistent and balanced sound. This is especially useful for electric guitars, which can often have a wide dynamic range, with loud strumming and soft picking passages.
By using compression, you can achieve a more polished and professional-sounding recording. Compression can also help to improve the overall clarity and intelligibility of your guitar playing, making it easier for listeners to hear the nuances of your performance.
There are many different types of compressors available, each with its unique set of features and controls. It’s important to experiment with different compressors to find one that suits your playing style and the sound you’re trying to achieve.
Here are some examples of how compression can be used to improve the sound of an electric guitar recording:
- Reduce the volume of loud strumming passages to prevent them from overpowering the quieter picking passages.
- Increase the volume of quiet picking passages to make them more audible.
- Smooth out the overall dynamics of the guitar performance to create a more consistent sound.
- Enhance the sustain of the guitar notes, making them sound fuller and more resonant.
- Add warmth and body to the guitar’s tone, making it sound more rich and powerful.
Compression is a powerful tool that can be used to improve the sound of your electric guitar recordings. By understanding how to use compression effectively, you can achieve a more polished, professional, and balanced sound.
| Compression Technique | Effect on Electric Guitar Sound |
|---|---|
| Reducing loud peaks | Prevents overpowering of quiet passages |
| Increasing quiet passages | Enhances audibility |
| Smoothing dynamics | Creates a more consistent sound |
| Enhancing sustain | Makes notes sound fuller and more resonant |
| Adding warmth and body | Produces a richer and more powerful tone |
10. Reverb
Reverb is an essential tool for creating a sense of space and ambience in your electric guitar recordings. It can be used to simulate the natural reverb of a room or to create a more artificial, stylized effect. Reverb can add depth and richness to your guitar sound, making it sound more natural and immersive.
- Adding Depth and Space
Reverb can be used to add depth and space to your guitar sound by simulating the natural reverb of a room. This can make your guitar sound more realistic and immersive, as if it were being played in a live space.
- Creating Ambience
Reverb can also be used to create a sense of ambience in your recordings. This can be useful for adding atmosphere and mood to your music. For example, you could use a long, lush reverb to create a sense of mystery or awe.
- Enhancing the Natural Sound of Your Guitar
Reverb can also be used to enhance the natural sound of your guitar. A subtle amount of reverb can help to smooth out the sound of your guitar and make it sound more polished and professional.
- Experimenting with Different Reverb Settings
There are many different reverb settings available, so you can experiment to find the sound that best suits your music. You can adjust the decay time, the pre-delay, and the mix to create a wide range of different reverb effects.
Reverb is a powerful tool that can be used to add depth, space, and ambience to your electric guitar recordings. By experimenting with different reverb settings, you can create a wide range of different sounds and effects. So don’t be afraid to experiment and find the reverb sound that best suits your music.
11. Delay
Delay is a powerful tool that can be used to add depth and interest to your electric guitar recordings. It can create a wide range of effects, from subtle echoes to long, lush reverbs. Delay can also be used to create rhythmic effects, such as slapback delay, which can add a sense of movement and groove to your playing.
- Echoes
Echoes are one of the most common uses of delay. They can be used to create a sense of space and depth in your recordings. Echoes can also be used to add atmosphere and mood to your music.
- Slapback Delay
Slapback delay is a short, rhythmic delay that is often used to add a sense of movement and groove to guitar playing. Slapback delay can be used to create a variety of effects, from subtle thickening of the sound to more pronounced rhythmic effects.
- Other Effects
Delay can also be used to create a variety of other effects, such as doubling, chorus, and flanging. These effects can be used to add depth, texture, and movement to your guitar recordings.
Delay is a versatile tool that can be used to add a wide range of effects to your electric guitar recordings. By experimenting with different delay settings, you can create a variety of sounds and effects that will add depth, interest, and movement to your music.
FAQs on How to Record Electric Guitar
Before embarking on your electric guitar recording journey, it’s essential to address some frequently asked questions to ensure a successful and rewarding experience.
Question 1: What is the most critical factor in recording electric guitar?
Answer: Microphone placement is paramount. The position and distance of the microphone relative to the guitar speaker significantly impact the captured sound’s tone and character.
Question 2: How do I achieve a warm and natural electric guitar sound?
Answer: Utilize a dynamic microphone placed slightly off-axis from the speaker. This technique captures the guitar’s natural warmth while reducing harshness.
Question 3: What is the role of equalization (EQ) in electric guitar recording?
Answer: EQ allows you to shape the guitar’s tone by adjusting specific frequency ranges. Boosting the low frequencies enhances warmth, while cutting the high frequencies reduces brightness.
Question 4: How do I add depth and ambience to an electric guitar recording?
Answer: Reverb is an essential tool for creating a sense of space and ambience. Experiment with different reverb settings, such as decay time and pre-delay, to achieve the desired effect.
Question 5: What is the purpose of compression in electric guitar recording?
Answer: Compression controls the guitar’s dynamic range, reducing loud peaks and boosting quiet passages. This technique enhances the overall consistency and clarity of the recording.
Question 6: How can I experiment with different electric guitar tones?
Answer: Don’t be afraid to experiment with various guitars, amplifiers, and pedals. Each combination will yield a unique sonic fingerprint, allowing you to explore a wide range of electric guitar tones.
Summary: Recording electric guitar requires careful attention to microphone placement, EQ, reverb, compression, and experimentation. By understanding these essential elements, you can capture the true essence of your guitar’s sound and create recordings that will captivate your audience.
Transition: Now that you have a solid foundation in the fundamentals of electric guitar recording, let’s delve deeper into the technical aspects and explore advanced techniques to elevate your recordings to the next level.
Tips on How to Record Electric Guitar
To refine your electric guitar recording techniques, consider these valuable tips:
Tip 1: Experiment with Microphone Placement
Experimenting with microphone placement is crucial for capturing the desired guitar tone. Try positioning the microphone at different distances and angles from the speaker to achieve a range of sounds, from warm and subtle to bright and aggressive.
Tip 2: Utilize Multiple Microphones
Using multiple microphones can enhance the recorded sound by capturing different aspects of the guitar’s tone. Blend the signals from two or more microphones placed at strategic locations to create a fuller and more complex sound.
Tip 3: Explore Different Amp Settings
The amplifier plays a significant role in shaping the guitar’s sound. Experiment with various amplifier settings, including gain, EQ, and effects, to discover the perfect combination that complements your guitar and playing style.
Tip 4: Pay Attention to Room Acoustics
The acoustics of the recording space can significantly impact the sound of your guitar. Choose a room with minimal reflections and background noise to ensure a clean and accurate recording. Consider using acoustic treatment materials to optimize the room’s acoustics.
Tip 5: Master the Art of Equalization (EQ)
EQ allows you to fine-tune the frequency response of your guitar recording. Use EQ to boost or cut specific frequencies to enhance clarity, reduce harshness, or add warmth. Experiment with different EQ settings to achieve the desired tonal balance.
Tip 6: Utilize Compression and Rev
erb
Compression helps control the dynamics of your guitar recording, reducing loud peaks and boosting quiet passages. Reverb adds depth and ambience, creating a sense of space and atmosphere. Experiment with different compression and reverb settings to achieve the perfect balance and enhance the overall sound of your recording.
Tip 7: Don’t Neglect Post-Processing
Once you’ve recorded your guitar tracks, don’t overlook the importance of post-processing. Techniques like noise reduction, panning, and limiting can further refine your recordings, removing unwanted noise, optimizing the stereo image, and ensuring a polished and professional sound.
Tip 8: Practice and Experiment
The key to mastering electric guitar recording lies in practice and experimentation. Spend time experimenting with different techniques and settings to discover what works best for your guitar, playing style, and musical goals. The more you practice, the more proficient you will become in capturing the perfect electric guitar sound.
By following these tips, you can elevate your electric guitar recordings to a professional level, capturing the true essence of your instrument and creating recordings that will resonate with your audience.
Transition: With these tips at your disposal, you are well-equipped to explore advanced recording techniques that will further enhance the quality and impact of your electric guitar recordings.
The Art of Recording Electric Guitar
Through this comprehensive exploration of “how to record electric guitar,” we have delved into the intricacies of capturing the essence of this versatile instrument. From choosing the right gear to mastering advanced techniques, we have provided a roadmap for guitarists and recording engineers alike to elevate their recordings to new heights.
The journey of recording electric guitar is a continuous pursuit of sonic excellence. By embracing experimentation, understanding the technicalities, and refining your skills, you can unlock the full potential of your instrument and create recordings that will captivate and inspire.


